![]() |
| © 2009 Sylvia Liu |
Thursday, June 30, 2011
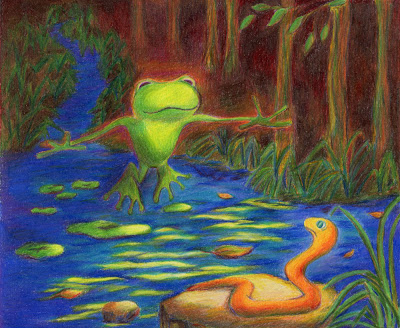
Illustration Friday: Midsummer Night
Labels:
Illustration Friday
Saturday, June 25, 2011
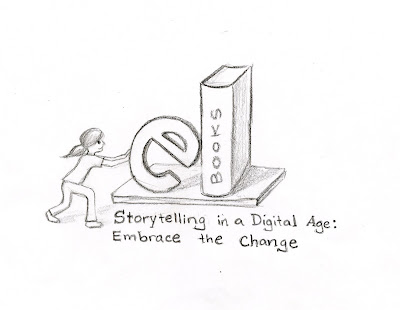
Logo Designs: Exercising Creativity Within Constraints
I'm not a logo designer, and I know there are many talents and skills needed for truly successful designs. Nevertheless, as an illustrator, I sometimes try my hand at designing logos, either for friends, or in design competitions. It's a nice way to exercise creativity within strict parameters (the client's or contest organizer's vision and specifications), and to try different styles. Here are some recent pieces I have done:
(1) logo design entry for illustration conference: I recently took part in a contest to design a logo for the Austin SCBWI chapter's upcoming fall conference, "Storytelling in the Digital Age: Embrace the Change." They only requested rough thumbnail sketches, so this was my entry:
and this was the winning entry, which was very winning indeed.
(2) logo design entry for new business: My father-in-law and brother-in-law recently started an investment firm in South Florida and ran a logo design contest on www.designcontest.com. I designed a few ideas, but did not end up submitting the logos. This was one that had some promise, but I did not have time to get it to a point I was happy with:
(1) logo design entry for illustration conference: I recently took part in a contest to design a logo for the Austin SCBWI chapter's upcoming fall conference, "Storytelling in the Digital Age: Embrace the Change." They only requested rough thumbnail sketches, so this was my entry:
![]() |
| © 2011 Sylvia Liu |
(2) logo design entry for new business: My father-in-law and brother-in-law recently started an investment firm in South Florida and ran a logo design contest on www.designcontest.com. I designed a few ideas, but did not end up submitting the logos. This was one that had some promise, but I did not have time to get it to a point I was happy with:
The design contest, entries, and winner can be found here.
(3) CD cover for preschool video: A good friend produced a video yearbook for her son's preschool and asked me to design a simple, colorful CD cover incorporating the school's logo and the three primary shapes. This is what I ended up with:
If you enjoyed this post, you may also like:
Labels:
logos
Tuesday, June 21, 2011
Illustration friday: Launch
![]() |
| © 2011 Sylvia Liu |
Labels:
Illustration Friday,
surfing
Sunday, June 19, 2011
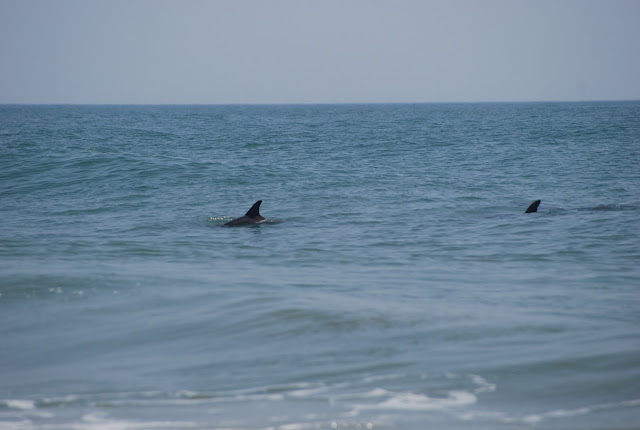
Summertime in Virginia Beach
Spent the last week at the beach while my daughters were at surf camp. These pics are from Friday, when the waves were beautiful and the dolphins out. I love the summer.
Labels:
beach,
inspiring places,
surfing,
Virginia Beach
Sunday, June 12, 2011
Get Creative with your Facebook Profile Picture
Ever notice a really creative Facebook profile picture? If you have minimal Photoshop skills, you can make your Facebook profile picture stand out. Even if you don't know Photoshop, Facebook apps and programs can help you achieve the same effects. Here are a couple ideas for changing up your Facebook profile picture, along with websites with detailed instructions:
1. The cool silhouette effect. Facebook will generally resize any photo that is larger than 200 pixels wide or 600 pixels high, which results in the usual tiny photo. However, if you use Photoshop to resize your photo to no more than 200 pixels x 600 pixels, Facebook will not shrink the photo and it will appear as a larger profile pic. So by resizing a photo and making the background transparent (using the Magic Extractor), I came up with this profile photo:
I was inspired to do this by the article, "5 Creative Ways to Hack Your Facebook Profile Picture."
2. The panoramic view. You can take advantage of the thumbnail photos across the top of your profile page to create an integrated image like this:
I came across this idea in various forms, but most notably in the article, "25+ Examples of New Creative Facebook Profile Pages." This page provides a detailed tutorial, and the website, "'Hack' Your Facebook Profile Page" provides some handy Photoshop templates to work with. The basic steps are: (1) use a template with the photo squares sliced out and manipulate your target photo in a lower layer so the images show through the window; and (2) upload the 6 resulting photos to a Facebook album and tag yourself in the 5 little ones, starting from the last to the first.
If you are using Photoshop Elements, which does not have the Slice tool, you can achieve the same effect by (1) taking a screenshot of your Facebook profile, (2) selecting and deleting each window (so it becomes transparent), (3) manipulating your target photo in a lower layer; (4) cropping each resulting photo and saving it as a separate photo; and (5) uploading the photos to Facebook and tagging the 5 little ones. (Tip: make sure you resize the photos to 72 dpi).
Don't have Photoshop? No problem.
A quick web search also reveals a bunch of websites that allow you to do this in minutes with no knowledge of Photoshop. A nice site that aggregates and reviews these is "How to Hack Your Facebook Profile in 30 Seconds."
If you liked this post, you may also like:
- How to Add a Favicon to your Blogger Blog
- Different Ways to View your Blogger Blog
- How Flipboard Jump-started my Twitter Experience
Saturday, June 4, 2011
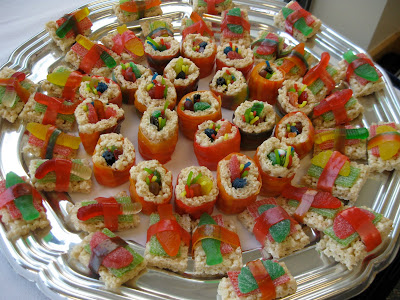
Sweet Saturdays: Candy Sushi and Cookie Burgers
If you liked this post, you may like:
Subscribe to:
Posts (Atom)


